Membership Management A how to guide
PlanIt-BookIt is not just a booking system, it\’s also a comprehensive contact / membership management system.
Use this how-to guide to better understand how to manage your clubs membership.
Membership Management – Contacts
Managing the users and members of a club is an administrative task. You must have an administrator login to the admin system in order to proceed.
Only one administration username, password exists per club, created during the PlanIt-BookIt sign-up process.
Go to https://admin.pi-bi.com/ in a browser to log in.
Once logged in you should see a screen with a number of coloured menu buttons, as per the example below.
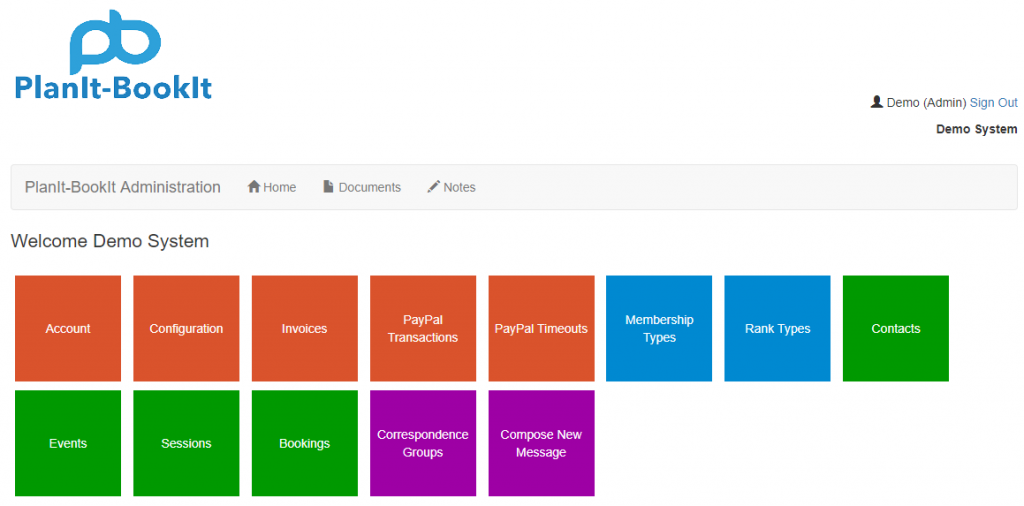
Depending on your setup configuration you may see more or less buttons.
Membership management is all handled from the first of the green buttons titled “Contacts”.
Click that button now to list the current members of your club. The list will be empty if no members have been added yet.
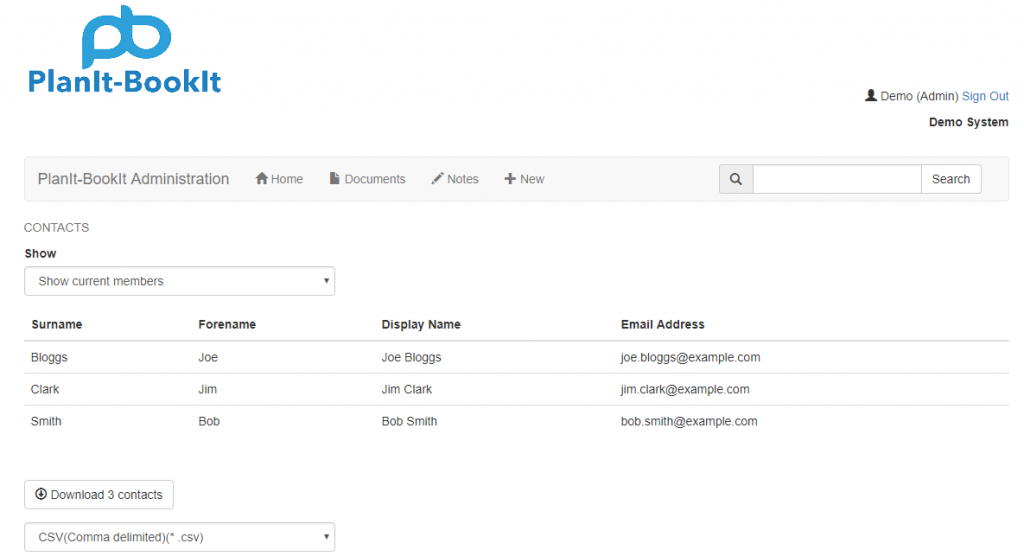
Adding A New Contact
To add a new contact click + New on the main navigation bar.
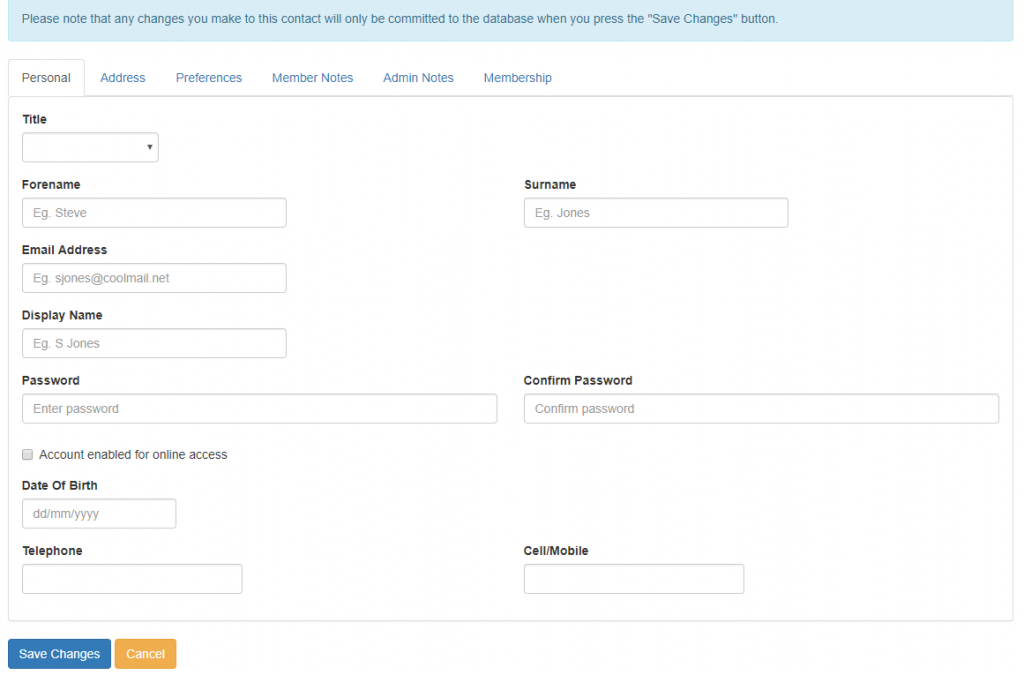
This will display a tabbed input screen like the following…
Personal Tab
The first tab is the \’Personal\’ tab.
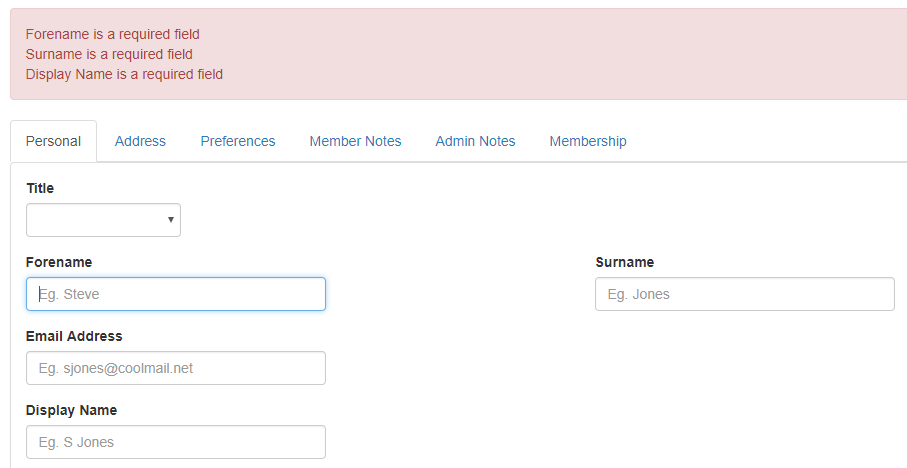
The minimum set of required fields are Forename, Surname and Display Name.
Click the ‘Save Changes’ button now on your empty form. The system prompts you for the required fields.
Create a new contact by entering all of the individuals details. To navigate to another tab simply click it. Add details to each tab, then move to the next tab. Navigating from tab to tab does not lose information. Pressing the \’Save Changes\’ button writes the information to the database.
The “Display Name” field on the “Personal” tab has to be unique. The “Display Name” is usually a combination of the persons “Forename” and “Surname”. However, it could also be a nickname or some other name that a person prefers.
The PlanIt-BookIt portal uses \’Display Name for such things as events, rankings, bookings, etc. It should be clear to others who view a display name who it is. Otherwise, they may find it difficult to locate you.
It is not necessary for an administrator to enter a password. Users can create their own passwords by clicking the “forgot my password” link from the PlanIt-BookIt portals sign-in page. Pressing the link emails password reset instructions.
On the personal tab you will notice a check box saying \”Account enabled for online access\”. By default this will be checked.
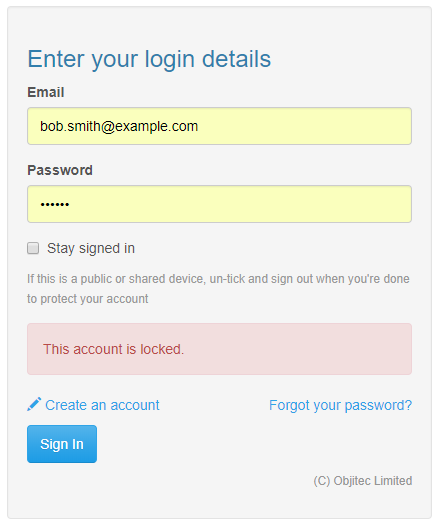
Un-checking it locks contacts out of the PlanIt-BookIt portal.
If you do un-check this box for a contact and they try to log in then they will see a red warning message: \”This account is locked\” on the sign in screen.
Address Tab
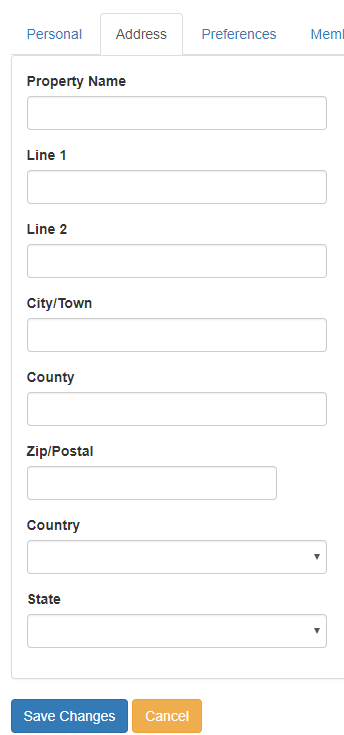
The address tab lets you enter the contacts home address details including country and state if applicable.
Preferences Tab
The preferences tab is where you can specify the privacy defaults for an individual, by default you should see the screen below.
These settings are available in the admin module and additionally in the PlanIt-BookIt portal.
Ideally, the contact should make changes to the defaults in the PlanIt-BookIt portal. Administrators should only change the defaults if requested.
Checking the box \”Check here to opt out of email correspondence\” removes that individual from all email communications. For example, booking reminders, cancellation notifications and club communications.
Un-checking the boxes next to the fields Name, Email, Telephone and Mobile hide those individual data items from other members being able to view.

Member Notes Tab
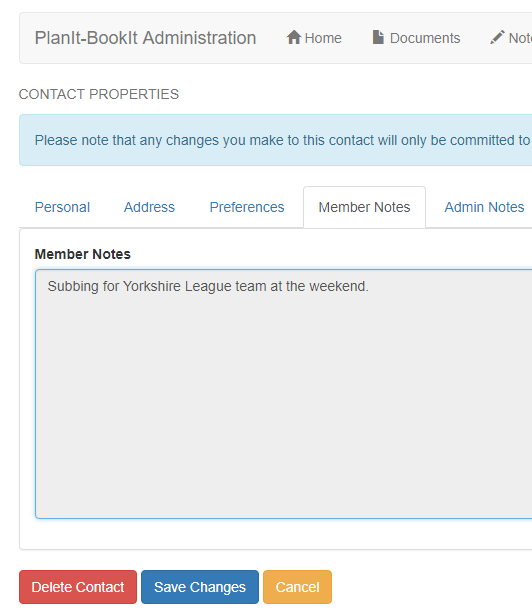
Within the admin portal member notes is a read only field. You can read notes left by members but you cannot modify them.
Admin Notes Tab
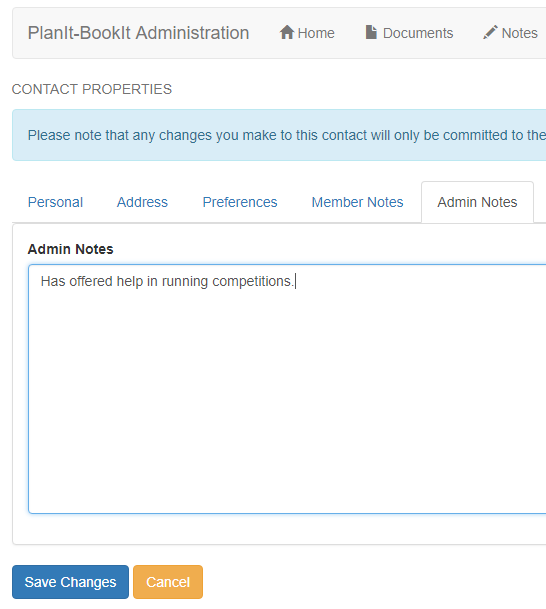
This is where administrators can record notes related to a particular contact, as per the example below.
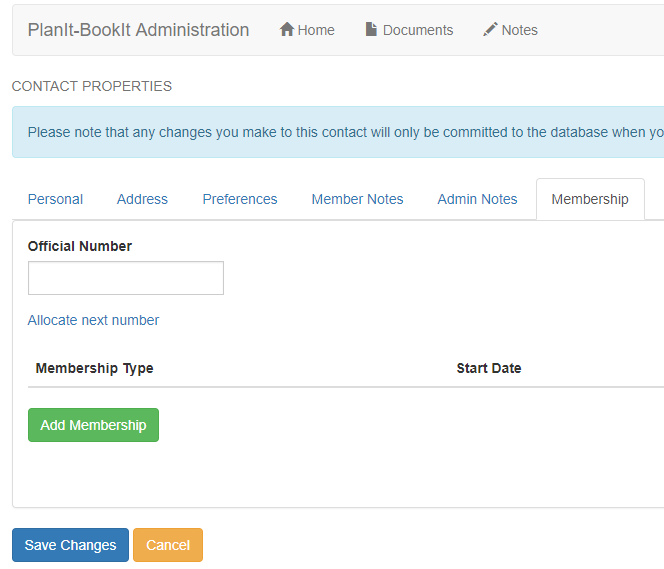
Membership Tab
This is where you can add membership details to a contact. For further details, please see the \”Membership Management – Adding A Membership To A Contact\” section of this guide.
Saving Changes
Once you have completed entering details of the contact on each tab you can click the blue \’Save Changes\’ button at the bottom right of the screen.
Clicking on the \’Save Changes\’ button writes all to the database.
If you\’ve added an active membership as per the membership management section then the contact will be saved with associated membership details.
If no membership details have been added then the contact will be saved just as a contact, with no membership details attached.
Membership Management – Adding A Membership To A Contact
To add a membership to a contact. On the memberships tab, click the green \’Add Membership\’ button. A prerequisite to this process is that you already have membership types set up.
Clicking the green \’Add Membership\’ button gives the following.
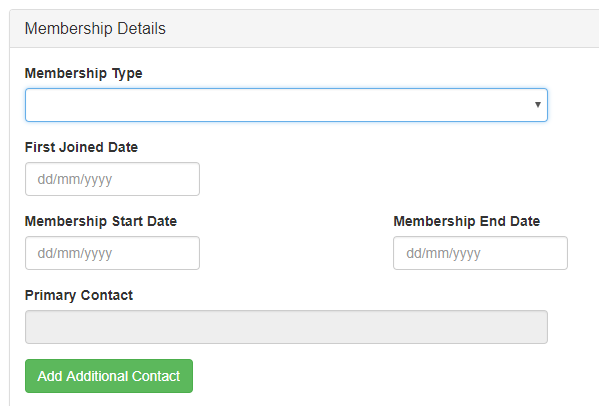
Click on the Membership Type drop down box to select the persons type of membership.
In our demo example there are three type of membership to choose from. Adult, Junior or Social.
Next enter the date the person first joined your club or organisation and their membership start date. Often, these two dates are the same.
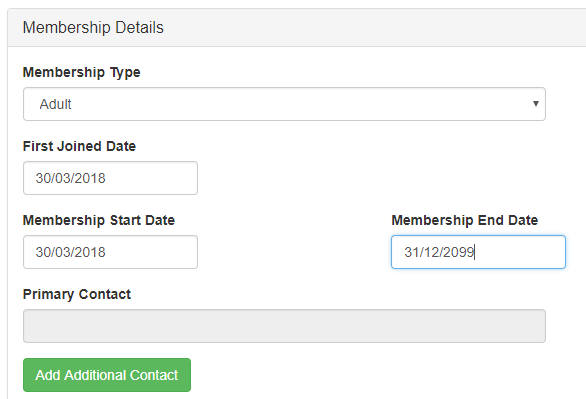
Finally enter the membership end date. For someone who pays you annually then you would enter a date one year on from the start date. For someone who pays you via direct debit or via some other automated process, add a date way into the future. This date can then be updated upon notification of the payment ending.
The example below shows the form completed, with a membership end date far into the future for say a direct debit payee or perhaps someone who has been granted lifetime membership.
Ignore the primary contact field that is greyed out, I will cover that in the next section.
Updating Membership Details
To update a members membership details. From contacts search for and select the contact.
Navigate to the members tab.
Click on the existing membership row.
Membership details will be displayed…
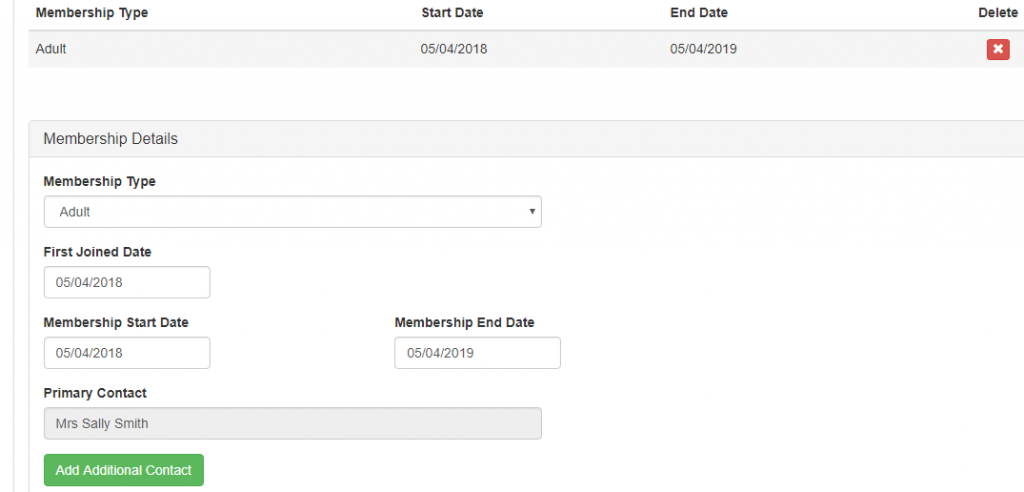
You can modify the Membership Type for example changing a Junior membership to an Adult.
You can also modify the First Joined Date and Membership Start and End Dates.
Modifying membership end dates is particularly useful if people renew their membership directly with your club or organisation and by pass the renewal functionality built into the PlanIt-BookIt portal.
Adding An Additional Contact To An Existing Membership (Family / Group Memberships)
PlanIt-BookIt admin\’s membership management includes the ability to add existing contacts to a membership. Use this for family or other group memberships. The following is an example…
- Jack Doe (Father)
- Jane Doe (Mother)
- Billy Doe (Son)
- Bobbi Doe (Daughter)
Adult Membership is £50
Junior Membership is £30.
Given the two membership types, membership for the family above would cost £160 – 2 x Adult @ £50 and 2 x Junior at £30. However, our demo club also offers a discounted family membership. Family membership is £120.
To set the above family up so as to take advantage of the discounted family membership, you first need to enter each contact as a new contact into the system. Next, you add a family-membership to any one of the contacts in the family.
Below shows an added membership.
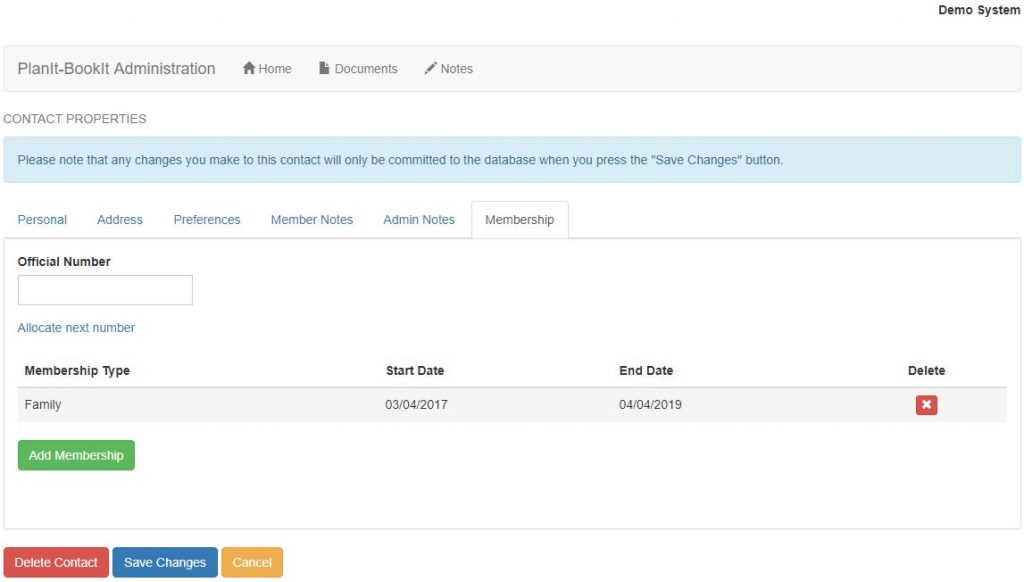
To add additional contacts to a membership, click on the membership row, this is the same process as updating a membership as discussed earlier.
Existing membership details are displayed…
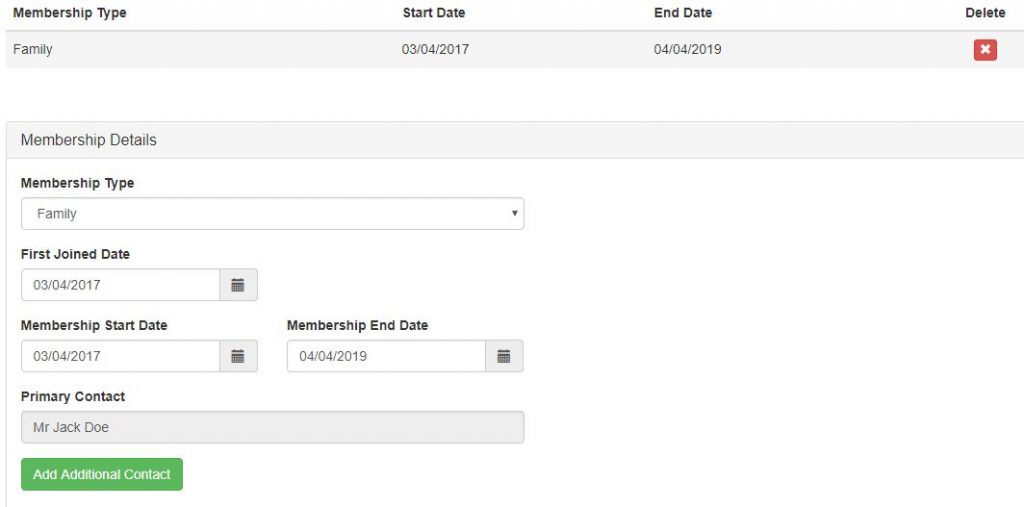
Click on the green \”Add Additional Contact\” and add the additional contacts associated with that membership.
Pressing the \”Add Additional Contact\” button shows the select contact modal…
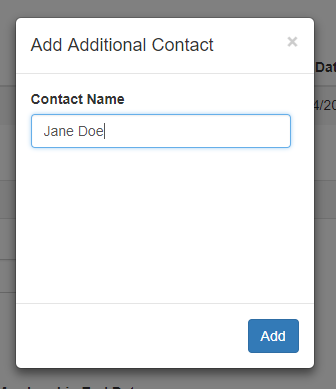
The \”Add Additional Contact\” pop-up window shows available contacts in a drop-down list, that you can add.
The list appears as you start to type and becomes more specific the more of the name you type.
When the contact you want to add has been selected or completely typed in, press the blue \”Add\” button.
The original contact will be the primary contact and this new contact will be added as an addition to the primary contacts membership.
After adding all family members, you will see them listed at the bottom of the screen as additional contacts, as per the example below…
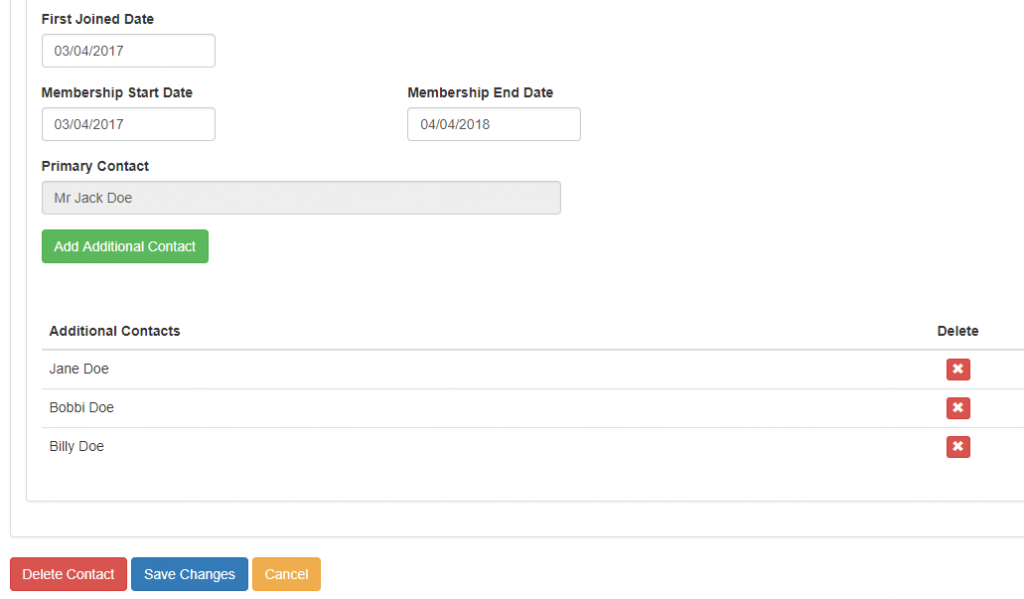
All additions share one membership.
Membership renewals can be performed by any member within the group.
If enabled by the club, then membership renewal reminders will be displayed one month prior to the membership end date in the PlanIt-BookIt portal.
Sharing An Email
If one of your members shares an email with someone else, or if children are members who don\’t have an email set up then PlanIt-BookIt allows two or more people to share the same email.
Continuing with the example we will make the children Bobbi and Billy Doe share their father\’s email.
For each child we select the personal tab and enter the fathers email in the email field.
Doing so and clicking the \”Save Changes\” button will give you the following warning message, highlighted in red at the top of the form.
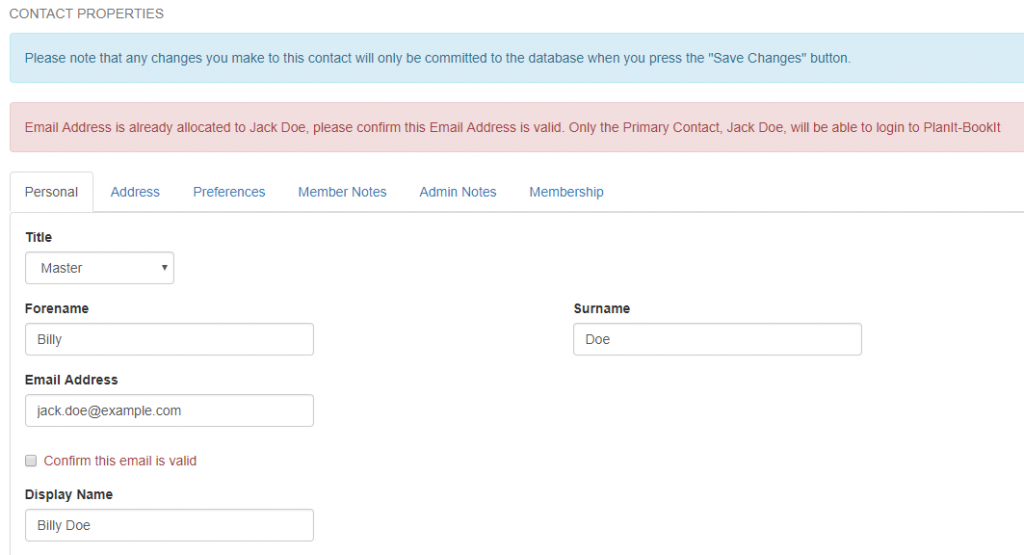
To confirm that you do want to use the same email as another contact you have to check the box to the left of the \”Confirm this email is valid\” and then click the \”Save Changes\” button once again.
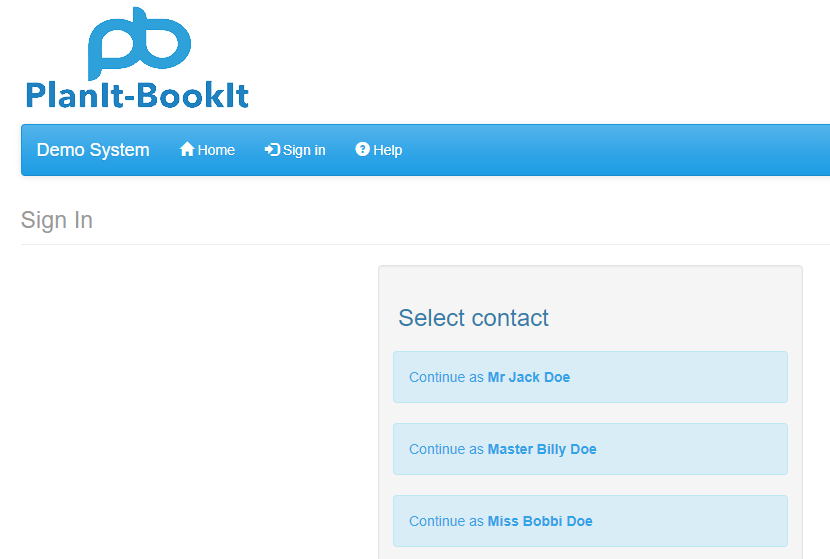
For members sharing emails only the primary contact can log into the PlanIt-BookIt portal.
The primary contact will be asked who they want to log in as…
Deleting A Contact Or Member
To delete a contact or member. Search for and select the individual.
And then click on the red \”Delete Contact\” button at the bottom of the contact details form.
A warning message will be displayed similar to the one below.
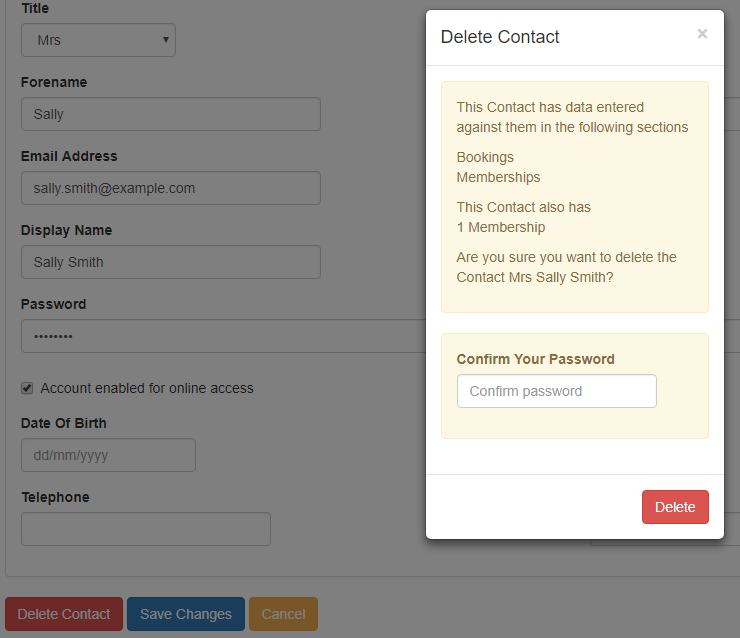
The warning message states any connections to the system that the contact may have, for example if they still have an associated membership or if they have any bookings, rankings, etc.
Even with warnings, the contact can still be deleted, however anywhere that the contact was used in the PlanIt-BookIt portal their name will be replaced with \”Contact Deleted\”
Enter your admin password and press the delete button to delete the contact.